
HP Laserjet M604 M605 M606 Paper Jam:
13.xx Error Codes, Causes, and Verified Fixes
An HP Laserjet M604 M605 M606 Paper Jam is never random. The printer raises a 13.xx event code at the exact instant a sheet fails to reach, or fails to clear, one of the optical sensors in the paper path. That code is a map. Read it correctly and the repair stops being guesswork.
Everything below is drawn from HP’s own troubleshooting documentation for these three models. We have deliberately avoided publishing any remedy we could not verify against that source, because a wrong fix on a HP printer paper jam usually means a second service call.
Preview Snapshot

- A HP Laserjet M604 M605 M606 Paper Jam code tells you where the sheet stopped, not merely that it stopped.
- Five sensors carry the load: PS102 pre-feed, PS103 TOP, PS106 and PS108 media width, and PS700 fusing delivery.
- Most no-pick faults trace back to a worn HP pickup roller, HP feed roller, or HP separation roller.
- Residual-media and power-on codes throw a False Paper Jam when no sheet is visible anywhere.
- Fuser wrap, multi-feed, and duplex re-feed jams each carry a distinct code and a distinct repair path.
- Disciplined HP paper jam troubleshooting plus scheduled roller work ends most Repeated Paper Jam callbacks.
Stop Fighting Paper Jams. We'll Fix Them.
What Does an HP Laserjet M604 M605 M606 Paper Jam Actually Mean?
It means a sensor did not see paper when it expected to, or still sees paper when it should not. That single sentence explains the entire 13.xx family. Everything after the first two digits describes location and timing.
The base engine on these three printers watches the sheet with five sensors:
- PS102 — pre-feed sensor
- PS103 — TOP, or registration, sensor
- PS106 and PS108 — media-width sensors
- PS700 — fusing delivery sensor at the fuser exit
Optional feeders add their own eyes. Trays 3 through 5 report through PS1603, the 1,500-sheet high-capacity input feeder reports through PS1704, and the duplexer reports through PS1502. Any one of them can be the HP paper path sensor that trips the fault.
So when a technician sees a HP Laserjet M604 13 paper jam Error, a HP Laserjet M605 13 paper jam Error, or a HP Laserjet M606 13 paper jam Error on the control panel, the first move is not to open covers at random. It is to read the suffix.
Which 13.xx Jam Codes Appear on the M604, M605, and M606?
Twenty-one codes are documented in HP’s troubleshooting guide for this platform. Each one below is quoted in meaning from that source. Use this as your reference table before touching a single screw.
| Code | Verified Meaning | Sensor Involved |
|---|---|---|
| 13.00.00 | Generic jam event code | Not specified |
| 13.00.EE | Unknown door open | Door switches |
| 13.A2.D2 | Tray 2 media feed jam. Media never reached PS102 after pickup started. A no-pick jam. | PS102 |
| 13.A2.Dx | Optional tray media feed jam. D3–D6 map to Trays 3–6. | PS1603 / PS1704 |
| 13.A2.FF | Residual media jam in Tray 2, detected at the Tray 2 feed sensor. | PS102 |
| 13.A3.FF | Residual media jam in Tray 3, detected at the Tray 3 feed sensor. | PS102 |
| 13.B2.Az | Media stay jam in top cover at the image area. Paper still at PS103 past the time limit. | PS103 |
| 13.B2.Dz | Media delay jam in top cover. Paper never reached PS103 in time. | PS103 |
| 13.B2.E2 | Media jam in top cover at the image area caused by a door open condition. | SW101 |
| 13.B2.FF | Media residual jam in top cover. Paper present at PS103 at power on or after a jam clear. | PS103 |
| 13.B9.Az | Fuser delivery stay jam. Paper present at PS700 past the time limit. | PS700 |
| 13.B9.Bz | Multi-feed jam in fuser, with less than 5 to 15 mm of non-overlap. | PS700 |
| 13.B9.Cz | Fuser wrap jam. Media left PS700 too early, meaning it is wrapping the fuser roller. | PS700 |
| 13.B9.Dz | Fuser delivery delay jam. Media never reached PS700 in time. | PS700 |
| 13.B9.FF | Residual media jam at the fuser output sensor, at time-out or at power up. | PS700 |
| 13.D3.Bz | Multi-feed to duplex re-feed jam. | Duplexer |
| 13.D3.Dz | Late to duplex re-feed jam. | Duplexer |
| 13.E5.FF | A power on jam has occurred. | Not specified |
| 13.EA.FF | A door jam has occurred. | Door switch or sensor |
| 13.EE.FF | A door jam has occurred. | Door switch or sensor |
| 13.FF.EE | A power on jam has occurred. | Not specified |
| 13.FF.FF | Power on residual paper jam. No specific sensor is designated. | Any paper-path sensor |
One code supplied to us, 13.B2.F2, does not appear in HP’s troubleshooting documentation for these models. We will not publish a fix for a code we cannot verify. If your event log shows it, capture the full log and we will trace it against the secondary jam data.
HP Inc. — Official HP Customer Support, Product Documentation
For a HP LaserJet M604 paper jam, a HP LaserJet M605 paper jam, or a HP LaserJet M606 paper jam, this table is the whole diagnostic map. Nothing else is needed to start.
Why Does the Printer Stop Feeding Paper From the Tray?
Because the sheet never reached the pre-feed sensor in the allotted time. That is a no-pick, and it is the single most common HP paper feed problem we see in the field. Codes 13.A2.D2, 13.A2.Dx, 13.A2.FF, and 13.A3.FF all live here.
Offices report it two ways. Either the Printer Stops Feeding Paper partway through a long job, or it sits there with a full tray and simply refuses, which staff describe as the HP printer not picking up paper at all. Both descriptions point to the same fault class.
HP’s verified remedy sequence for a Tray 2 no-pick (13.A2.D2):
- Open Tray 2, remove the jammed paper, close the tray.
- Open and close the upper top cover so the printer can attempt its own clear.
- Pull the paper out and confirm the tray size guides are set correctly and the tray is not overfilled.
- Confirm the Tray 2 pickup, feed, and separation rollers are installed correctly and show no damage or wear.
- Clean or replace the pickup and feed rollers as needed.
- Verify the media in use meets HP specifications for the printer.
- Go to Administration, then Troubleshooting, then Diagnostic Tests.
- Run the Tray 2 pickup/feed motor drive test. If the motor is not functioning, replace the pickup assembly.
- Test PS102 using the Tray/Bin Manual sensor test.
- If the error persists, replace the paper pickup assembly.
- If PS102 itself is defective, HP directs that the issue be elevated for possible printer replacement.
For 13.A2.Dx on Trays 3 through 6, the sequence is the same, but the sensor under test is PS1603 for Trays 3 to 5 or PS1704 for Tray 6. If that sensor is defective, HP directs replacement of the paper input unit that houses it.
For the residual codes 13.A2.FF and 13.A3.FF, the printer is seeing paper it should not see. Clear the tray, cycle the upper right door, then check the connectors at the sensor, the feed motor, and the DC controller PCA before you touch the pickup assembly.
Printer Repair Experts carries HP pickup roller, HP feed roller, and HP separation roller stock on the van for these models, so a Printer Will Not Feed Paper call is usually a one-visit repair. When a HP printer keeps jamming from an upper tray, HP’s own guidance is worth repeating: Tray 1 and Tray 2 are the most reliable pick points, and moving a problem job down to them is a legitimate stopgap.
What Causes a Paper Jam in Top Cover and the Registration Area?
The registration sensor, PS103, sits at the image area. Every sheet must arrive there on schedule and leave on schedule. When it does not, you get the 13.B2 family, and a Paper jam in Top Cover message on the panel.
13.B2.Dz — media delay jam. The sheet never reached PS103 in time. HP’s remedy:
- Open the top cover and check the feed area for jammed media.
- Check the tray feed and separation rollers for wear. Replace them if worn.
- Test the top of page sensor, PS103.
- Check the registration assembly.
- Replace parts as the tests determine.
This is the code where a tired HP registration roller and a glazed feed roller most often show up together. The sheet is being picked, but it arrives late.
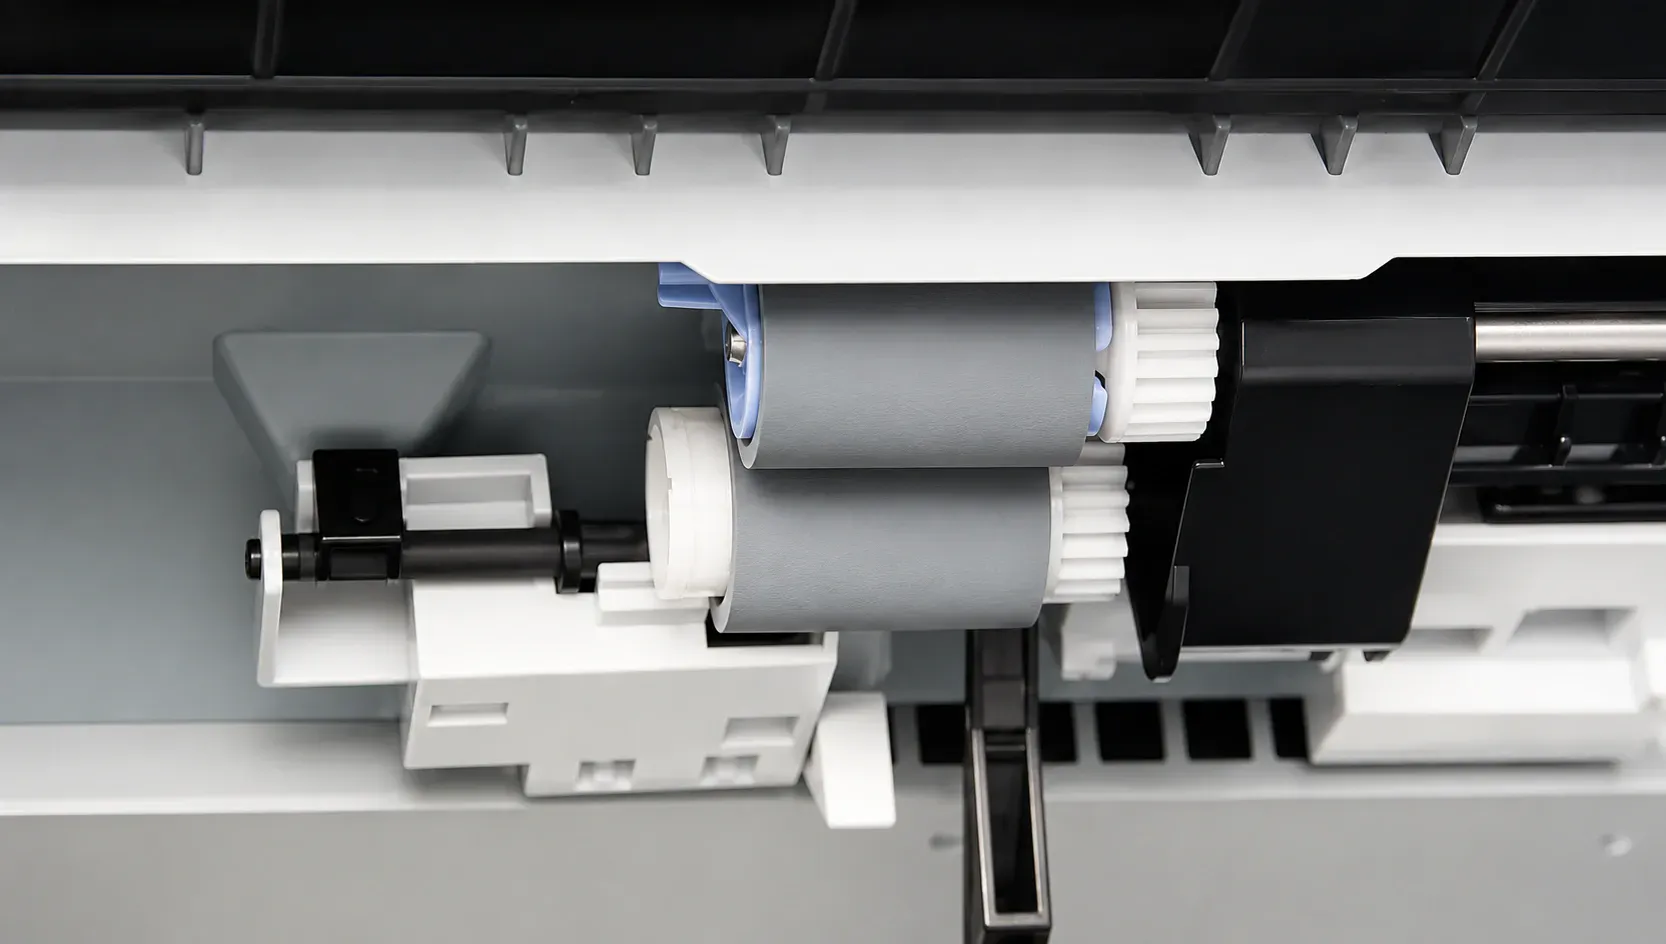
13.B2.Az — media stay jam. The sheet is present at PS103 longer than its expected length plus 50 mm. Open the top cover, confirm PS103 moves freely, check under the toner cartridge at the transfer area for damaged or unseated parts, confirm the media meets HP specification, then run the Registration Sensor Test and test media-width sensors PS106 and PS108. Replace whatever the tests condemn.
13.B2.E2 — jam caused by a door open condition. Close every door and cover and resend the job. If the message persists with everything shut, test the SW101 door open detection switch in the diagnostic tests and replace the switch if it fails.
13.B2.FF — residual jam in the top cover. Paper is sitting at PS103 at power on or after a clear. Open the top cover, check the feed area, check under the toner cartridge at the transfer area to confirm everything is seated, then test PS103.
Why Does an HP Laserjet M604 M605 M606 Paper Jam Keep Happening at the Fuser?
Because the fuser is where heat, pressure, and timing all have to agree. PS700 watches the fuser exit. The 13.B9 family is that sensor complaining, and it produces the Paper jam in Fuser message operators dread.
13.B9.Cz — fuser wrap jam. The sheet vanished from PS700 too early, which tells the printer the paper is wrapping the fuser roller. HP’s remedy is short and blunt. Open the top and rear covers and clear the jam. Confirm the media meets specification. If the sheet is found wrapped around the fuser roller and the media is within HP specification, replace the fuser assembly.
There is a useful field note buried in HP’s own text. If customer media is within specification but curls upward in the output bin, rotate the stack in the tray so the former top sheet becomes the bottom sheet. Paper that curls down instead of up is far less likely to wrap.
13.B9.Az — fuser delivery stay jam. Paper is still at PS700 past the limit. Causes include an accordion jam at the fuser exit, output bin rollers that are not turning, or a sticky fuser exit flag. Let the fuser cool first. Then clear the jam, verify media, check the fuser delivery sensor for free movement, look for debris from a prior jam in and around the fuser rollers, confirm the output bin rollers turn, and run the manual sensor test on PS700. If PS700 is faulty, the fuser assembly is replaced.
13.B9.Bz — multi-feed jam in the fuser. Two sheets went through almost perfectly overlapped, with less than 5 to 15 mm of offset. The remedy path mirrors 13.B9.Az, but the root cause is nearly always a separation roller that has stopped separating.
13.B9.Dz — fuser delivery delay jam. The sheet never made it to PS700. HP splits this one by where the paper actually stopped. If it stopped in the toner and transfer area before the fuser, check that the toner cartridge and transfer roller are seated, inspect the cartridge guides and transfer roller assembly, and inspect the white plastic collar around the drum drive gear. A broken collar lets the cartridge seat too deeply and the drum drive never engages. That calls for the drum drive assembly.
If the sheet stopped in or at the fuser, let it cool, remove the fuser, and inspect the fuser sleeve, pressure roller, and delivery roller for blockage or damage. Verify the fuser inlet guide is not detached or broken. Then run the sensor test on PS700 and the fuser motor drive test.
13.B9.FF — residual media at the fuser output sensor. Clear the top and rear areas, close the covers to let the printer self-clear, verify media, then pull the fuser and inspect the sleeve, pressure roller, and delivery roller. Test PS700 and run the fuser motor drive test.
The same fuser logic carries forward across the platform. A HP Laserjet M607 M608 M609 Fuser Error or a HP LaserJet M610 M611 M612 Fuser Error follows the identical diagnostic discipline, which is why our technicians stock fusers for the whole line rather than one model.
Need Help With an HP LaserJet M604, M605 or M606 Paper Jam?
What Triggers an HP Duplex Paper Jam or a Paper Jam in Rear Door?
A HP duplex paper jam means the sheet failed on its second pass. The 13.D3 codes cover it. 13.D3.Bz is a multi-feed to duplex re-feed jam. 13.D3.Dz is a late to duplex re-feed jam.
HP’s remedy for both is identical:
- Confirm the customer is using a genuine HP cartridge, and retest with another known-good cartridge.
- Run at least 50 pages in simplex to confirm the fault only appears when duplexing.
- Test duplexing from multiple trays. If it is tray-specific, troubleshoot that tray’s pick and feed instead.
- Confirm the tray is configured correctly. If Tray 1 is set to Any Size and Any Type, set it to the size actually being printed.
- Remove the duplexer and clean the duplex path of debris and dust.
- Clean the static charge eliminator next to the transfer roller.
- Confirm all duplexer connections to the DC controller are seated.
- If the fault survives all of the above, replace the duplex unit and the fusing assembly, then test.
A Paper jam in Rear Door is usually simpler. Open the rear output bin, grasp both sides of the sheet, and pull it slowly. Loose toner may be present, so be deliberate.
If most of the sheet is still inside the machine, HP recommends removing it through the top cover instead. If it tears, move to the fuser-area procedure.
An Output Bin Paper Jam is the easiest of all. If paper is visible in the output bin, grasp the leading edge and remove it. A HP rear door paper jam that recurs after a clean removal, however, is telling you something upstream is wrong. Treat the recurrence, not the sheet.
Paper jam in Tray 1 and Paper jam in Tray 2 clear in the obvious way, but the details matter. On Tray 2, do not pull the sheet straight out. Pull it down and toward the back of the printer first, or it will tear and leave debris that causes the next jam.

Why Does the Printer Report a False Paper Jam With No Paper Inside?
Because a sensor is either blocked, stuck, or failed. This is the residual and power-on group, and it is the most frustrating HP printer paper jam to explain to an office manager who has already checked every tray.
13.FF.FF — power on residual paper jam. HP is explicit that no specific sensor is designated, and that it could be any sensor in the media feed path. The remedy:
- Check the printer for a jam.
- Look for media or obstructions anywhere in the paper path.
- View the event log to see whether other jam errors are also occurring, and troubleshoot those.
- Use the Manual sensors test or the Tray/Bin manual sensors test to isolate a faulty door switch or sensor.
- Replace parts as the sensor tests or obstructions indicate.
.
13.E5.FF and 13.FF.EE are both power-on jams. Check the printer for a jam and work the clear-jams procedure. 13.EA.FF and 13.EE.FF are door jams. Clear the jam, then use the component test or the manual sensors test to isolate a faulty door switch or sensor.
13.00.EE is an unknown door open. Confirm every door and cover is genuinely closed. 13.00.00 is the generic jam event code and simply directs you to work the clear-jams procedure.
This is where methodical HP paper jam repair pays for itself. A scrap of a torn sheet sitting against PS103, or a door switch that has lost its spring, will keep a machine down all week while staff take turns opening covers.
How Do Rollers and the HP Laserjet Maintenance Kit Prevent Repeated Jams?
They restore the friction and timing the paper path was designed around. Rollers are consumables. Once the surface glazes, no software setting will bring the grip back.
HP’s own recurring-jam checklist is worth working through before any part is condemned:
- Use only paper that meets HP specification for the printer.
- Use paper that is not wrinkled, folded, or damaged.
- Do not reuse paper that has already been printed or copied on.
- Do not overfill the tray. Straighten the stack and return only part of it if you have.
- Set the guides so they touch the stack without bending it.
- Confirm the tray is fully inserted in the printer.
- Confirm the Trays menu matches the paper size and type actually loaded.
- Confirm the printing environment is within HP’s recommended specifications.
Cleaning is straightforward and belongs in any HP Laserjet Printer Maintenance routine. Pull the tray, open the spring-loaded cover, pinch the blue tab, and slide the feed, pick, and separation rollers off their shafts. Wipe them with a damp, lint-free cloth. Never touch the roller surface with bare fingers, because skin oil causes print-quality defects.
On reinstallation, one detail is skipped constantly. Before the feed roller goes back on, confirm the torque limiter, the white roller on the shaft beside it, is seated against the locking pins. Get that wrong and the tray will mis-pick from day one.
When cleaning no longer holds, the kit goes in. HP Laserjet M604 Maintenance Kit Installation, HP Laserjet M605 Maintenance Kit Installation, and HP Laserjet M606 Maintenance Kit Installation all restore the fuser and the feed components together, which is why we recommend the kit over piecemeal roller swaps on a high-volume machine.
We stock the HP Laserjet M604 Maintenance Kit, the HP Laserjet M605 Maintenance Kit, and the HP Laserjet M606 Maintenance Kit, along with the matching HP Laserjet maintenance kit for adjacent models, so a HP Laserjet Printer Maintenance Kit replacement is generally a same-visit job. Ask us about the HP Laserjet Printer Maintenance Kit interval that fits your monthly volume.
Should a Business Repair or Replace a Jamming HP LaserJet?
Repair, in almost every case, and the math is not close. A fuser, a maintenance kit, or a pickup assembly on an M604, M605, or M606 costs a fraction of a comparable replacement engine, and these printers routinely run for years after the work is done.
Downtime is the real cost. A jamming printer in a busy office does not fail cleanly. It fails intermittently, swallows an hour a day in staff time, and quietly corrupts print queues while everyone works around it. That is the hidden line item nobody budgets for.
Fleet consistency matters too. Offices running a mix of models across the M604 to M612 range benefit from standardized parts and one service relationship. HP Laserjet M604 M605 M606 Printer Repair, HP LaserJet M607 M608 M609 Printer Repair, and HP Laserjet M610 M611 M612 Printer Repair all draw on the same diagnostic logic and largely overlapping part families.
Before any expensive component is replaced, Printer Repair Experts performs a complete diagnosis to verify the actual cause of the failure. We have watched too many machines receive a new fuser when the real fault was a fifteen-dollar separation roller and a torque limiter that was never seated.
Our technicians handle HP Laserjet M604 Printer Repair, HP Laserjet M605 Printer Repair, and HP Laserjet M606 Printer Repair onsite, along with broader HP Laserjet Printer Repair and HP Color Laserjet Printer Repair across the same platform. Because we carry fusers, rollers, and kits on the van, HP Laserjet M604 Onsite Printer Repair, HP Laserjet M605 Onsite Printer Repair, and HP Laserjet M606 Onsite Printer Repair are usually completed in a single visit.
We provide HP Laserjet Printer Repair Orange County coverage and service much of Los Angeles County as well, including Printer Repair Anaheim CA and Printer Repair Commerce CA. Same-day printer repair is available for many of these faults, and every repair carries a 6-month warranty on service and installed parts. High-quality third-party toner is available and backed by a 1-year warranty.
Onsite printer repair removes the worst part of the process, which is boxing up a 50-pound machine and losing it for two weeks. Whether the request comes in as Business printer repair, Office printer repair, or simply HP printer repair, the diagnostic discipline is the same. So is the goal: the printer works when your staff walk up to it.
Related failures on the wider platform, including a HP LaserJet M607 M608 M609 Paper Jam or a HP LaserJet M610 M611 M612 Paper Jam, follow the same 13.xx logic described here. If you can read the code, you are already most of the way to the fix.
Conclusion
A HP Laserjet M604 M605 M606 Paper Jam is a solvable, well-documented fault. The printer tells you which sensor complained and when. Match the code to the verified remedy, respect the roller wear that caused it, and the machine stops eating your workday.
When a HP 13 paper jam Error or any HP 13.xx paper jam error keeps returning after the obvious clears, the cause is upstream of the sheet you can see. That is the point to call a technician rather than open the covers a seventh time. Reach Printer Repair Experts at (888) 657-0021 or info@printer-repair-experts.net, and we will get the fleet back to work.
Tired of Clearing the Same Paper Jam?
FAQ's - Frequently Asked Questions -
Not necessarily. Codes like 13.FF.FF, 13.E5.FF, and 13.EE.FF are residual or power-on jams, and HP notes that 13.FF.FF has no specific sensor designated, meaning any sensor in the feed path could be reporting. A torn scrap resting against a sensor flag, or a door switch that has weakened, will produce a jam message with nothing visible. The fix is a sensor test, not a harder look inside the covers.
There is no single number, because roller life follows pages and paper quality rather than the calendar. The practical trigger is behavior: once the printer starts mis-picking or double-feeding after a proper cleaning, the rollers are done. On high-volume machines most offices are better served by scheduling the maintenance kit, which restores the fuser and feed components together, rather than chasing individual rollers.
It is generally safe, but it is expensive. Repeated jams tear sheets, and torn fragments migrate into the paper path where they block sensors and cause new faults. A fuser wrap jam in particular can damage the fuser sleeve. Running a machine that jams every few dozen pages usually converts a small repair into a larger one.
Yes, and it is one of the most common causes we find. HP is explicit that paper must meet specification, must not be wrinkled or damaged, and must not have been printed on previously. Paper stored in a humid room absorbs moisture and curls as it enters the fuser, which is a direct contributor to wrap jams. Switching to a fresh, acclimated ream resolves a surprising number of service calls.
Both, depending on the cause. If the jam traces to worn feed components or a failing fuser, the kit is the repair. If the jam traces to a broken sensor, a failed door switch, or a damaged drum drive collar, the kit will not touch it. That distinction is exactly why we diagnose before quoting parts.
Service and installed parts carry a 6-month, 180-day warranty. If the same fault returns within the warranty period, we come back out.
We perform nearly all repairs onsite. We carry common replacement parts, including fusers, rollers, and maintenance kits for the HP LaserJet M604 through M612 series, so most paper jam repairs are completed during the first visit without the printer ever leaving your office.
On rare occasions, we may recommend bringing the printer to our repair facility. This is typically necessary when space limitations at your location make the repair impractical, or when the printer must be extensively disassembled to access and replace internal components. Performing these more complex repairs in our shop allows us to work more efficiently with specialized tools and a controlled environment, helping ensure the repair is completed correctly and thoroughly.
In most cases, there is no additional charge for pickup and delivery when an in-shop repair is recommended as part of the service. Our goal is to make the repair process as convenient as possible while ensuring your printer is repaired properly and returned to you as quickly as possible.
Yes, and it is usually the most economical way to do it. The models across this platform share diagnostic logic and overlapping part families, so a technician already onsite can service several machines in one trip rather than billing separate visits.