
HP LaserJet E60155 E60165 E60175 Paper Jam
Troubleshooting Guide
An HP LaserJet E60155 E60165 E60175 paper jam is rarely as mysterious as it feels while you stand at the printer. The E60155dn, E60165dn, and E60175dn share one print engine and one set of jam-clearing procedures, plus one habit that confuses people: the door named on the screen is not always where the trouble started.
This guide works from evidence outward. It begins with what to write down, moves through safe clearing and paper checks, and isolates the input source before interpreting codes such as 13.B2.D2, 13.B9, and 13.FF.FF. If the problem reaches beyond feeding and jamming, our HP LaserJet E60155 E60165 E60175 printer repair page covers the wider model family.
Preview Snapshot
- All three models are single-function, print-only HP LaserJet Managed printers with automatic duplexing, so scanner and document-feeder jam steps do not apply to them.
- Every HP LaserJet E60155 E60165 E60175 paper jam message comes with a control-panel animation, and following it is the safest first move.
- HP documents 13.B2.D2 as a late sheet from Tray 2, even though the panel sends you to the rear door.
- A jam in the fuser area is a paper-path event. A 50.xx message is a separate fuser fault.
- 13.FF.FF is a power-on residual jam that does not name one sensor; the event log holds the more specific entry.
- Jams that survive correct clearing and fresh supported paper call for roller, sensing, or timing diagnosis rather than more door-opening.
What to Record Before You Open a Single Door
A jam that happens once and a jam that keeps returning need different responses, and the difference usually shows up only when someone writes things down. Capture the details below before anyone touches a door. Clearing the jam removes the message from the screen, and a phone photo of the panel takes seconds.
| Detail to record | Why it matters |
|---|---|
| Exact model: E60155dn, E60165dn, or E60175dn | Confirms the printer is a Managed E601xx unit, so these procedures apply, and not an MFP model with a right-door paper path. |
| Installed trays and accessories | Optional 550-sheet feeders, the 2,100-sheet high-capacity tray, and the envelope feeder each add jam locations and codes. |
| Full code, including the suffix | 13.A1.D1 and 13.A1.FF both involve Tray 1 but describe different events. |
| Paper source of the failed job | Separates a single-tray feed problem from a path problem that every tray shares. |
| Single-sided or two-sided | A jam that appears only on two-sided jobs points toward the duplex return path. |
| First occurrence or repeat | One jam after a bad ream is housekeeping. The third jam this week is a diagnosis. |
Treat the record as a pattern log rather than paperwork. Three entries showing the same code from the same tray tell a technician far more than a note saying the printer “jams a lot.” Across several E601xx units, the same log can also show whether a problem follows one machine or one paper delivery.
Clearing an HP LaserJet E60155 E60165 E60175 Paper Jam Without Creating a Second One
Start with the animation on the touchscreen. HP builds a clearing sequence into the control panel for each jam location, and HP’s user guide for the LaserJet Managed E60155, E60165, and E60175 documents each location separately, from Tray 1 and Trays 2 through 5 to the rear door and fuser area, the output bin, and the duplexer.
A few habits keep a simple jam from turning into a torn one:
- Grasp visible paper with both hands and pull it straight out, slowly and evenly.
- Check each removed sheet for missing corners. A missing corner means a fragment is still inside.
- Let the fuser cool before reaching into the rear door area. HP warns that the fuser is hot while the printer is in use.
- Close every door and tray fully so the printer can re-check the paper path.
Know where to stop. Leave the jam alone if a sheet will not move without force, if removal would mean taking off covers or assemblies beyond the documented user procedure, or if the same spot jams again right after clearing. Forcing paper past rollers can bend guides and sensor flags, and those are harder to put right than the jam itself.
After clearing, send one short test job from the same tray before the printer goes back into the shared queue. If that job runs, note the event and move on. If it fails at the same point, you have your first repeat, and the next sections apply.

Onsite Help for a Jam That Keeps Returning
The $69.99 Onsite Printer Repair Promotion puts a technician at your E60155dn, E60165dn, or E60175dn to find out why the jam comes back. Call (888) 657-0021 or email info@printer-repair-experts.net. Limitations may apply.
Rule Out Paper First, Then Isolate the Feed Source
Repeat jams are often investigated in the wrong order, with hardware first and paper last. Reverse it. Media and tray settings cost nothing to check, and ruling them out makes every later conclusion more reliable.
Media and Guide Checks
- Use paper within HP’s specifications for these printers. HP also advises against wrinkled, folded, damaged, or previously printed sheets.
- Look for curl and dampness, especially in reams stored open or near an exterior door.
- Keep the stack below the tray’s fill marks, and set the width and length guides against the paper without bending it.
- Confirm that the size and type configured for the tray match what is physically loaded.
Then run the comparison that settles the paper question. Load fresh, supported paper from an unopened ream and repeat the job that failed. If the jam disappears, the original stock or the way it was stored is the suspect, not the printer.
Comparing Tray 1, Tray 2, and Optional Feeders
Each E60155dn, E60165dn, and E60175dn ships with a 100-sheet multipurpose Tray 1 and a 550-sheet Tray 2. HP also supports up to four optional 550-sheet feeders, a 2,100-sheet high-capacity tray, and an envelope feeder, so the list of input sources depends on what your unit actually has installed.
Send the same job from each installed source. A failure confined to one tray points at that tray’s pickup, feed, and separation path, its guides, or its media. A jam that follows the job from every source points downstream, toward paths the trays share, such as registration, the fuser area, and the output and duplex routes.
A common complaint shows the value of this step. When the report is E60165 paper not feeding from tray 2 while Tray 1 prints normally, the fault is already narrowed to Tray 2 setup or Tray 2 feed hardware before any shared assembly needs attention.
Reading the Code Family
HP organizes tray codes on this platform by source. Tray 1 problems appear as 13.A1 codes, including 13.A1.A1, 13.A1.D1, and 13.A1.FF. HP’s grouped clearing guidance for Tray 2 and the optional trays covers 13.B2, 13.A3, 13.A4, and 13.A5, and the user guide also lists 13.A2 messages for Tray 2.
The suffix matters as much as the prefix. Trailing characters separate different events, such as a sheet that arrived late versus paper still detected at a sensor. Installed accessories also change the numbering: the 2,100-sheet tray reports under whichever tray number it is assigned, and it adds a 13.FF.EE Door Open Jam message of its own.
So read a code family as directions to an area of the printer. It does not prove that one assembly has failed, and the same family can describe a loading mistake one week and a worn roller the next.
Trace the Roller, Sensor, or Timing Fault
A rear-door message after a Tray 2 job is a clue, not a verdict. We review the event log, check roller seating and wear, and run sensor tests before recommending any repair. Call (888) 657-0021 to schedule a diagnosis.
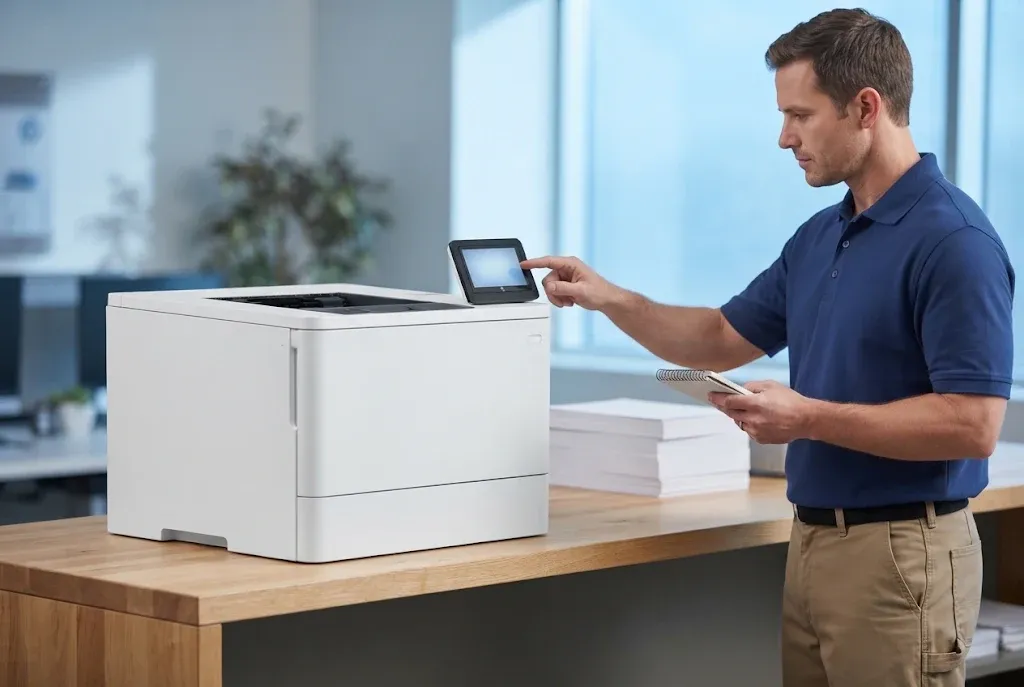
13.B2.D2: A Tray 2 Problem Reported at the Rear Door
The HP LaserJet 13.B2.D2 jam is the clearest case on this platform of a message pointing away from its cause. The panel reads “13.B2.D2 Jam in rear door,” yet HP’s control-panel documentation describes a paper delay: a sheet fed from Tray 2 did not reach the registration sensor in the expected time. HP’s related support article pairs the code with a “Tray 2 Overfill or Roller Issue” message.
HP LaserJet E60155 E60165 E60175 Tray 2 Overfilled or Roller Issue
Symptom. Jobs from Tray 2 stop with the rear-door message, while the same job sent from Tray 1 may print normally. Staff usually describe it as an HP LaserJet Managed Tray 2 paper jam that keeps showing up at the back of the printer.
Root cause. A late Tray 2 sheet has a short list of documented suspects. These are an overfilled tray, guides set incorrectly, an obstruction or leftover shipping lock in the tray, worn Tray 2 feed and separation rollers, and rollers that are not seated and latched in their correct position.
Diagnosis. Pull Tray 2 completely out, remove damaged sheets, and check for any orange shipping locks on a recently installed unit. Reload fresh supported paper below the fill marks and run the job again. If 13.B2.D2 returns from a correctly loaded tray, a technician inspects roller wear, confirms the roller assembly is installed and latched correctly, and checks that the printer reports Tray 2 empty when it really is empty.
Remedy and repair component. Correcting the tray setup resolves the overfill side of the message. When the rollers are worn or uneven, HP’s documented remedy is replacing the Tray 2 feed and separation rollers. Seating is checked first, because a correctly reseated roller set does not need replacing.
When we recommend service. Book a diagnosis when the code returns after a correct reload with fresh paper, or when anything inside the tray cavity looks broken or out of place. Please do not press or move unidentified tabs inside the cavity. Treat every Tray 2 Overfilled or Roller Issue report as two questions, tray setup and roller condition, and leave the second one to a technician.
Rear-Door and Fuser-Area Stops That Are Not Fuser Failures
The rear door is the jam-access point HP designed into these printers, so many messages send people there. HP lists 13.B2 and 13.B9 messages for the rear door and fuser area, with 13.B9 reading “Jam in Fuser.” An E60175 rear door paper jam message therefore identifies a location in the paper path. It does not, by itself, mean the fuser has failed.
A 13.B9 event and a 50.xx message belong to different categories. 13.B9 says paper stopped or was detected in the fuser area, while 50.xx messages report a fuser operating fault. When the screen shows a 50.xx code instead of a jam, the detailed steps belong on our HP LaserJet E60155 E60165 E60175 fuser errors page.
Symptom and root cause. Sheets stop inside the rear door or come out folded. Contributors include damaged or curled media, a torn fragment from an earlier jam, and obstructions in the accessible rear path. A stop at the same point every time can also reflect a worn or damaged part along that stretch of the path.
Diagnosis and remedy. With the fuser cool, open the rear door, pull any sheet straight out, and check for remnants. Note where the leading edge stopped, then compare that point across later failures. If clearing and fresh paper end the problem, nothing needs repair.
Repair component and service. When sheets keep stopping in the same place, a technician examines the guides, sensing, and fuser-area handling before any assembly is condemned. The fuser assembly is replaced only when testing shows it is the cause, since a fuser-area jam alone is not that evidence. We recommend service for repeat stops at one location, paper that tears on removal, or grinding and clicking during the jam.
Jams That Happen Only on the Second Side
A jam that appears only during two-sided printing narrows the search immediately. A duplex page is turned and routed back for its second side, which brings the duplex path into play. HP documents 13.D3 for jams in the duplexer on this platform, and the user guide lists 13.C, 13.D, and 13.B duplexer messages that are cleared through the rear door.
HP LaserJet E60155 E60165 E60175 Duplex Printing Jams
Run a matched pair of test jobs: ten single-sided pages and ten two-sided pages on the same fresh paper from the same tray. If only the two-sided job fails, the HP LaserJet Managed duplex paper jam belongs to the return path rather than the trays. Also confirm the size is one HP lists for automatic duplexing on these models, which are letter, legal, executive, and 8.5 × 13 in.
Clearing stays a user task: open the rear door, follow the animation, and remove any sheet. Diagnosis beyond that is technician work. We assess the duplex guides, sensing, and second-side feed timing, and we do not replace duplex components on the strength of a code alone. Service makes sense when two-sided jobs fail repeatedly on supported media while single-sided jobs run clean.
E601xx Jam Repair With a 180-Day Warranty
We bring more than 20 years in the office equipment industry to HP LaserJet Managed printers across Orange County and approved parts of Los Angeles County. Service and installed parts carry a 6-month / 180-day warranty, and same-day service may be available. Email info@printer-repair-experts.net or call (888) 657-0021.
When the Panel Reports a Jam and There Is No Paper
An HP LaserJet paper jam with no paper visible is one of the more frustrating calls, because every door looks clean. The printer is still reporting something real. It believes paper is present at a sensor, or that a sheet arrived late.
The possibilities are limited: a small hidden fragment, residual paper from an earlier clear, a sensor flag held out of position by debris or damage, or a fault in the sensing circuit itself. Only the first two can be fixed with a flashlight and patience.
HP LaserJet E60155 E60165 E60175 13.FF.FF Residual Paper Jam
13.FF.FF is the power-on form of this problem. It describes residual paper detected when the printer starts, and it does not point to one designated sensor. HP notes for this printer family that when a residual jam occurs at power-on, the specific jam code goes to the event log rather than the control panel.
That is why a restart is not a repair. Cycling power can make the message disappear briefly, but if the fragment or the faulty flag is still there, the next startup or job brings it back. A technician reads the event log entry behind the 13.FF.FF message, inspects that area, and uses the printer’s sensor tests to confirm whether the flag and sensor respond correctly.
The remedy is either removing the hidden obstruction or repairing the sensing component those tests identify. We recommend service once a full check of every documented jam location finds nothing and the message persists.
Why E601xx Jams Keep Coming Back
Once the paper has been changed, the guides are set, and the trays have been compared, an HP LaserJet E60155 E60165 E60175 paper jam that still returns has mechanical or electrical causes left to check. E60155 E60165 E60175 recurring paper jams usually trace to one of four conditions, and each leaves a different signature.
HP LaserJet E60155 E60165 E60175 Feed and Separation Roller Problems
| Condition | What users notice | What a technician checks |
|---|---|---|
| Worn feed and separation rollers | Late sheets and delay codes from one tray | Roller surface condition and grip, tray by tray |
| Rollers not seated or latched correctly | Delay codes soon after rollers or trays were serviced | Roller installation and latch position |
| Multiple-sheet feeding | Two sheets entering together, then a jam further along | Separation roller condition, media, and stack setup |
| Skew or late arrival | Crooked output and intermittent delay jams | Guides, tray seating, and the timing pattern in the event log |
HP LaserJet Managed multiple-sheet feeding deserves a separate mention, because the resulting jam may be reported well downstream of the tray that caused it. Clearing the downstream sheet treats the symptom while the separation problem stays in place.
Diagnosis starts with the event log, which shows the source, sequence, and frequency of jam entries, and continues with the printer’s sensor tests. Together they show whether the same sensor keeps reporting from the same source. A jam code gives direction. It is not proof that a particular assembly must be replaced.
Fleet context changes the questions, too. An HP LaserJet Managed E60165dn paper jam that began the week a new paper brand arrived points to media first. An HP LaserJet Managed E60155dn paper jam on a lightly used unit raises different questions than an HP LaserJet Managed E60175dn paper jam on a 75 ppm unit carrying a whole floor’s output.
Proving the Fix
Whether a user cleared the jam or a technician repaired the cause, verify it the same way:
- Repeat a controlled job from the tray that failed, long enough to pass the point where it used to jam.
- Run the same job from another installed tray for comparison.
- Run a separate two-sided test.
- Confirm that the original code does not appear again in the event log during these runs.
Keeping Feed Problems From Returning
Prevention is mostly routine: sound paper storage, guides reset at every reload, and attention to the first repeat rather than the fifth. Our notes on regular HP printer maintenance cover the routine side.
When feed rollers are near the end of their life, a maintenance assessment decides whether individual rollers or HP LaserJet printer maintenance kits make more sense. Not every jam calls for a complete kit, and the assessment should say which parts are actually worn.
When a Recurring HP LaserJet E60155 E60165 E60175 Paper Jam Needs Onsite Diagnosis
Professional service is the right step once the basics are exhausted: paper replaced, guides set, sources compared, and the code still returns. It also applies to messages with no accessible paper, sheets that tear on removal, grinding or clicking during feeds, and any fix that needs internal access. At that point, onsite printer repair ends the cycle of clearing the same jam every morning.
An onsite visit follows the same evidence chain this page describes: your notes, the event log, sensor tests, and a controlled verification run. We explain what we found and what it needs before any repair work goes ahead. Many teams ask for onsite E60155 E60165 E60175 paper jam repair after the second or third repeat, and that is the right time to call.
We work onsite throughout Orange County, including Irvine, Santa Ana, Anaheim, Huntington Beach, and Fullerton, and in approved portions of Los Angeles County. See HP LaserJet printer repair in Orange County or HP LaserJet printer repair in Los Angeles for local details. For other HP LaserJet models in the same fleet, our HP LaserJet printer repair page is the place to start.
On cost, our page on printer repair costs and the onsite promotion explains how the promotional onsite labor applies to one printer per visit and why parts are quoted separately. Service and installed parts carry a 6-month / 180-day warranty, and same-day service may be available depending on the schedule.
Related model resources: offices that also run Enterprise models can use our guides to HP LaserJet M607 M608 M609 paper jams and HP LaserJet M610 M611 M612 paper jams. Those families have their own procedures and should not be treated as interchangeable with the Managed E601xx printers.
Record the code and the source, clear gently, rule out paper, isolate the tray, and read the code as a direction rather than a verdict. When a jam survives all of that, call (888) 657-0021 or email info@printer-repair-experts.net, and we will pick up the diagnosis where your notes leave off.
FAQ's - Frequently Asked Questions - E60155, E60165, and E60175 Paper Jams
No. Many repeat jams trace to paper condition, an overfilled tray, guides set loosely, or a tray size or type setting that does not match the loaded paper. A failed or worn part becomes the likely answer only after those are ruled out and the same code keeps returning from the same source.
Usually, yes. If Tray 1 or another installed tray feeds cleanly, routing jobs there keeps work moving and avoids adding stress to the failing source. Keep a note of which tray failed so the technician can test it first.
It can contribute. The printer handles media according to the size and type configured for the tray, so a mismatch between the setting and what is loaded is worth correcting before anything else. Check it whenever a tray is refilled with different stock.
Yes. Each optional feeder adds its own pickup path and tray-numbered codes, and the high-capacity tray also has its own door-open jam message. Tell us which accessories are installed so the codes are read against the correct tray numbers.
No. The E60155dn, E60165dn, and E60175dn are print-only, so there is no scanner or document feeder to clear. MFP models in nearby HP families use different access doors and procedures, and those steps should not be applied to these printers.
Check the agreement first, because some managed print contracts specify who may service the equipment. If your organization is responsible for repairs on the unit, we can diagnose and repair it onsite.
Our service and installed parts carry a 6-month / 180-day warranty. If the same failure returns within that period, contact us with the code and the tray involved so we can look at it again.
The $69.99 Onsite Printer Repair Promotion covers onsite labor for one printer per visit and does not include parts. When two or more printers need service during the same visit, our standard flat labor rate applies instead. Limitations may apply.