
HP Laserjet M631 M632 M633 Paper Jam Codes, Locations and Clearing Steps
An HP Laserjet M631 M632 M633 Paper Jam is identified by a 13.xx code on the control panel, and that code, not a guess about where paper usually sticks, decides which tray, door or accessory you open first. This guide pairs each HP Laserjet M631 M632 M633 Paper Jam code with its access point, numbered clearing steps, a controlled retest and the right next step when the same message comes back.
We wrote it for office managers, IT teams and administrative staff facing an HP LaserJet M631 M632 M633 paper jam message right now. Every procedure stays inside the access points HP documents for the HP LaserJet Enterprise MFP M631, M632 and M633 families.
Preview Snapshot
- Write down the full message and suffix before clearing anything. A 13.B9 and a 13.B2 send you to the same right door but call for different checks.
- Most print-path codes for an HP LaserJet M631 M632 M633 paper jam clear through the right door, where the fuser slides out on two side latches once it has cooled.
- HP’s user guide editions number some jams differently, such as 13.A1 versus 13.B2.D1 for Tray 1 and 13.70 versus 13.60 for the mailbox. Match the panel text to the hardware actually installed.
- A 31.13 document feeder jam involves originals being copied or scanned. It is not part of the print path.
- When the same HP LaserJet M631 M632 M633 paper jam code returns after a clean retest, or paper resists, the next step is diagnosis of rollers, sensors or assemblies rather than more pulling.
1. Read the Complete Jam Message Before You Open a Door
During an HP LaserJet M631 M632 M633 paper jam, the control panel shows a code and an animation that guides you to the location HP wants opened first. Treat that screen as evidence. A phone photo of the message, taken before anyone touches the printer, answers many of a technician’s later questions.
HP writes codes with variable positions. The XX in 13.A2.XX is a suffix that changes with the jam condition, the X in 13.8X is one variable digit, and Edition 4 uses yz, as in 31.13.yz. Record every character the panel shows.
What to record for every HP LaserJet M631 M632 M633 paper jam
- Full code and suffix: for example, 13.B9 followed by the two characters actually displayed.
- Paper source: Tray 1, Tray 2, an optional 550-sheet tray, the 2,100-sheet high-capacity input tray or the envelope feeder.
- Paper size and type: what the tray is set to and what is physically loaded.
- Simplex or duplex: whether the job printed on one side or both.
- Output destination: the standard output bin or an HP Stapling Mailbox bin.
- Where the leading edge stopped: still in the tray, at the right door, inside the fuser area or partly in the output bin.
Confirm the model and the installed hardware
The M631, M632 and M633 share one physical platform, so the steps for an HP LaserJet M631 M632 M633 paper jam apply across the family: M631dn, Flow M631h, M631z, M632h, M632fht, Flow M632z, M633fh and Flow M633z. What differs is the paper handling. Some configurations ship with extra 550-sheet trays, a 2,100-sheet high-capacity input tray or an HP Stapling Mailbox, and others add them later.
The model name appears on the front of the printer and on its configuration page. If it reads M607, M608 or M609, you have a single-function printer with a different access layout, so use our guide to HP LaserJet M607, M608 and M609 paper jams. Owners of the newer multifunction models should follow HP LaserJet M634, M635 and M636 paper jams, because the door and tray details are not identical.
2. HP Laserjet M631 M632 M633 Paper Jam Codes Mapped to Their Locations
This table is our code-to-location index for HP LaserJet Enterprise MFP 13.xx paper jam codes on this family. It combines Edition 1 (May 2017) and Edition 4 (October 2021) of HP’s M631, M632 and M633 user guide with HP’s support articles; where they differ, both appear, and your panel message takes priority.
| Displayed code | Jam location | Where to start |
|---|---|---|
| 13.A1.XX (Edition 1) or 13.B2.D1 (Edition 4) | Tray 1, the multipurpose tray | Tray 1, then the right door |
| 13.A2.XX (Edition 1), 13.B2.D2 (Edition 4) or 13.B2.A2 (HP support) | Tray 2 | Tray 2 drawer, then the right door |
| 13.A3.XX, 13.A4.XX, 13.A5.XX | Trays 3, 4 and 5 (550-sheet trays) | The indicated tray, then the right door |
| 13.A3.XX or 13.A4.XX | Envelope feeder in the Tray 3 or Tray 4 position | The envelope feeder |
| 13.AY.XX (Edition 1) or 13.A4 for HCI Tray 4 (Edition 4) | 2,100-sheet high-capacity input tray | The HCI tray and its feed area |
| 13.B2.XX | Right-door paper path | Right door |
| 13.B4.XX and 13.B9.XX | Right door, fuser area | Right door, then the cooled fuser |
| 13.FF.EE (Edition 1) or 13.FF (HP support) | Door-open jam | The door or feeder named on the panel |
| 13.D3.XX | Right door, duplexer | Duplex path behind the right door |
| 13.E1.XX | Standard output bin | Output bin exit area |
| 13.70.XX (Edition 1) or 13.60 (Edition 4) | HP Stapling Mailbox | Mailbox bins and rear jam-access door |
| 13.8X (Edition 1) or 13.83 (Edition 4) | Stapler/stacker | Bins and accessory access path |
| 66.80.yz (Edition 4) | Staple jam or stapler malfunction | Stapler door and staple cartridge |
| 31.13.XX or 31.13.yz | Document feeder (originals, not print path) | Document feeder cover |
HP does not present these headings as an exhaustive list of every HP LaserJet M631 M632 M633 paper jam suffix, and neither do we. Codes ending in .FF on the right-door group, such as 13.B2.FF and 13.B9.FF, are documented by professional repair references as residual jams, which we cover in Section 7. A displayed 50.xx message is a fuser error rather than an HP LaserJet M631 M632 M633 paper jam and follows a different diagnostic path.
3. Clearing Input-Side Jams: Tray 1, Trays 2–5, the High-Capacity Tray and the Envelope Feeder
An input-side HP LaserJet M631 M632 M633 paper jam means the sheet never made it cleanly out of its source. Open the source first, and only move to the right door when the paper has traveled past where you can reach.
Tray 1: 13.A1.XX or 13.B2.D1
- Gently withdraw the visible sheet straight out of Tray 1.
- If the sheet is out of reach or resists, stop pulling, close Tray 1 and open the right door.
- Remove accessible paper and torn scraps, close the right door and retest from Tray 1.
- If only Tray 1 fails, check its paper size and type settings, the side-guide position and the stack height before suspecting pickup or separation parts.
HP rates Tray 1 at roughly 100 sheets with a 10 mm (0.4 in) maximum stack. Guides should touch the stack without bending it, using the blue latches to set them.
Trays 2–5: 13.A2 through 13.A5
An HP LaserJet M632 Tray 2 paper jam is cleared the same way as a jam in any 550-sheet tray on this family. The digit after the A tells you which drawer to open.
- Confirm that the tray number on the panel matches an installed feeder.
- Pull the indicated tray out and remove jammed or damaged sheets.
- Remove paper caught in the feed rollers inside the opening, then reinsert and close the tray.
- If the animation points farther along the path, open the right door and clear what you can reach.
- Reload supported paper below the fill line, set the guides to the size marks and retest from the same tray. Then run the same job from a different tray.
An HP LaserJet M631 M632 M633 paper jam that repeats from one tray only points to that tray’s pickup, feed and separation rollers. HP recommends cleaning pickup rollers with a lint-free cloth lightly dampened with warm water. A roller that still slips after cleaning needs replacement, and we confirm the wear before ordering parts.
2,100-sheet high-capacity input tray: 13.AY.XX or 13.A4
- Confirm that the message points to the installed high-capacity feeder and not a 550-sheet tray.
- Open the tray, discard damaged sheets and unload the remaining stack.
- Lift the tray and pull it straight out, then pull any visible paper down and out of the feed area.
- Reinstall the tray, load full reams without splitting them, close it completely and retest.
Edition 1 writes this code as 13.AY.XX, where Y is the tray number assigned to the feeder; Edition 4 lists 13.A4 for an HCI installed as Tray 4. Follow the tray number on your panel. A 13.FF.EE door-open message here points to a feeder the printer reads as open.
Envelope feeder: 13.A3.XX or 13.A4.XX
The envelope feeder occupies the Tray 3 or Tray 4 position and shares those code prefixes, so choose this procedure by the installed hardware.
- Pull the envelope feeder completely out, lifting it slightly to free it.
- Remove jammed or damaged envelopes from the feeder and from the accessible feed opening.
- Reinstall the feeder and load supported envelopes as HP directs.
- Confirm the job’s envelope size and type in the print driver, then retest from that feeder.
One Recurring Jam, One $69.99 Onsite Visit
Our $69.99 Onsite Printer Repair Promotion covers one HP LaserJet M631, M632 or M633 per visit; parts are extra. Call (888) 657-0021 or email info@printer-repair-experts.net with your full jam code. Limitations may apply.
4. Right-Door Jams: Paper Path, Fuser Area and Door-Open Messages
Most print-path cases of an HP LaserJet M631 M632 M633 paper jam end at the right door. An HP LaserJet M631 M632 M633 right-door paper jam can sit near registration, transfer, the fuser or the duplex return path, and the code narrows which part of that opening matters. The HP support article on 13.B9, 13.B2 and 13.FF jam errors in the right door and fuser area covers the same printer family.
13.B2.XX: right-door paper path
- Open the right door shown on the panel.
- Remove visible paper and torn scraps from the accessible path.
- If the animation directs you to the duplex or fuser area, follow it.
- Close the door and retest with the original job settings.
An HP LaserJet M631 M632 M633 paper jam that repeats at the same point after a clean retest calls for a check of the paper guides, transport and sensors in the right-door path. Reopening the door again and again rarely changes the result.
13.B9.XX and 13.B4.XX: fuser area
An HP LaserJet 13.B9 fuser-area paper jam means the sheet did not clear the fuser area when the printer expected it to. Edition 4 of HP’s guide also lists 13.B4 as a right-door (fuser) jam.
- Let the fuser cool. HP cautions that it can be hot while the printer is in use.
- Open the right door and remove accessible jammed paper.
- If paper remains, grab the two side latches and pull the cooled fuser straight out, then clear paper from the fuser opening.
- Reinstall the fuser until it seats, close the right door and retest.
Stop and escalate if a sheet is wrapped or trapped and will not come free without force, if the fuser shows visible damage, or if the same 13.B9 code returns at the same point. Keep this separate from a displayed 50.xx message, which is a fuser fault with its own causes, covered in our M631, M632 and M633 fuser error troubleshooting guide.
13.FF.EE: door-open jam
- Identify the door or feeder named on the panel.
- Check its accessible paper path for a trapped sheet or scrap.
- Reseat the tray, or close and latch the door firmly.
- Retest.
If the door-open HP LaserJet M631 M632 M633 paper jam message returns with the path clear and the door fully latched, the printer is still reading that door or feeder as open. The latch and door-sensing parts then need a technician’s check.
5. Duplex and Output Jams: When the Sheet Stops on the Way Out
A duplex or output HP LaserJet M631 M632 M633 paper jam happens late in the print cycle. The page has usually been imaged and fused, which is why the sheet you pull out may already carry a printed side.
13.D3.XX: automatic duplex path
An HP LaserJet M633 duplex paper jam appears as 13.D3 in Edition 4 of HP’s guide, listed under the right door (duplexer). The duplex path returns the sheet for its second side, so a fault here may show only on two-sided jobs.
- Open the right door and inspect the duplex path shown in the animation.
- Remove visible paper and fragments.
- Close the right door.
- Print a one-sided test and a two-sided test on supported paper, then compare them.
Clean one-sided pages with failing two-sided pages put the focus on the duplex return path, its rollers and the duplex feed sensor. Mention that pattern when you call.
13.E1.XX: standard output bin
- Remove the output stack.
- Gently clear a visible sheet from the exit area.
- If the panel points to an HP Stapling Mailbox path, follow the accessory procedure in Section 6.
- Retest to the standard output bin where the configuration allows.
An HP LaserJet M631 M632 M633 paper jam that keeps stalling at the exit points toward the delivery rollers, exit guides or the fuser output sensor. Empty the bin before blaming hardware; a full stack is the easiest cause to rule out.
Paper Stops at the Same Spot Every Time?
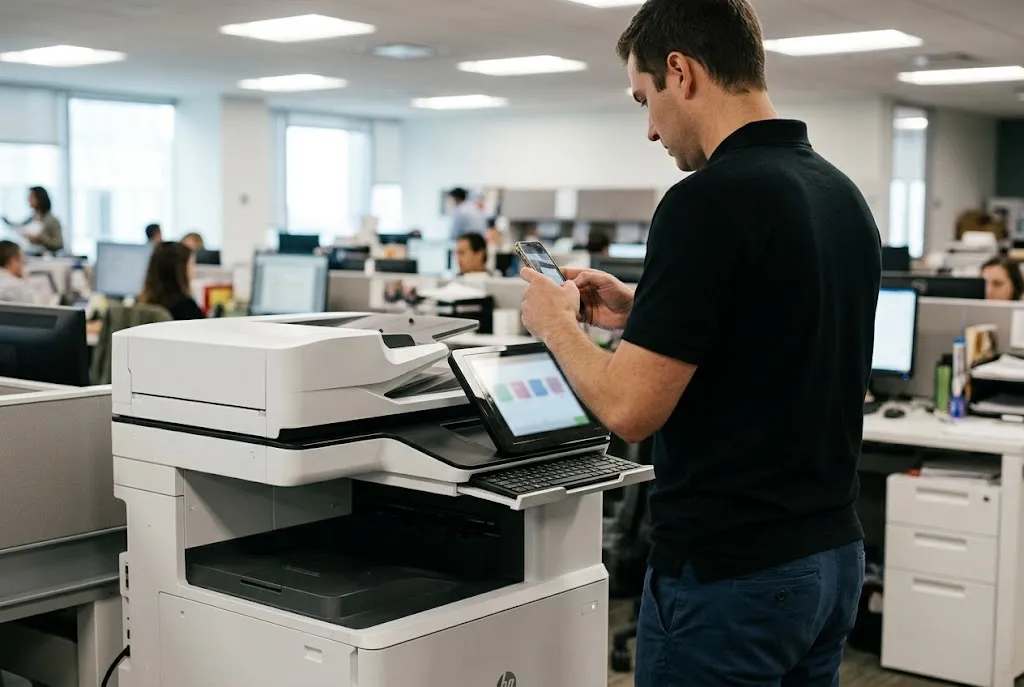
That repeat is a diagnostic clue. Our technician traces repeating 13.B2, 13.B9 and 13.D3 jams to the roller, sensor flag or assembly responsible and confirms the fault before replacing any part. Send your jam record to info@printer-repair-experts.net.
6. Finishing Accessory and Document Feeder Jams
Finishing codes for an HP LaserJet M631 M632 M633 paper jam only apply when the accessory is installed, so confirm the hardware before following these steps. The document feeder belongs here too, because it is often confused with the print path.
HP Stapling Mailbox: 13.70.XX or 13.60
An HP LaserJet Enterprise MFP Stapling Mailbox paper jam is listed as 13.70.XX (MBM jam) in Edition 1 of HP’s guide and as 13.60 in Edition 4. Confirm the full code and that a Stapling Mailbox is actually fitted before choosing this procedure.
- Remove visible paper from the indicated mailbox bins.
- Open the jam-access door on the back of the Stapling Mailbox and pull visible paper straight out.
- Close the jam-access door.
- Retest to the selected bin and, where available, compare with a job sent to standard output.
Stapler/stacker jams (13.8X or 13.83) and staple jams (66.80.yz)
For a stapler/stacker HP LaserJet M631 M632 M633 paper jam, the panel message separates paper trapped in the stacker from a jammed staple. Paper follows the bin and access-door path above, while a staple jam follows HP’s cartridge procedure.
- Open the stapler door.
- Pull the colored handle on the staple cartridge and pull the cartridge straight out.
- Lift the small lever at the back of the cartridge and remove the jammed staples.
- Close the lever until it snaps into place, insert the cartridge until the handle snaps, close the stapler door and retest with a small stapled job.
31.13: the document feeder is a separate path
The HP LaserJet M631 M632 M633 31.13 Document Feeder Jam involves originals that stop during copying or scanning, so it is not a print-path HP LaserJet M631 M632 M633 paper jam. Lift the latch to open the document feeder cover, remove the original, close the cover, set the input guides snugly against the stack and retry with a clean, unstapled sheet.
HP specifically warns against feeding originals with staples or paper clips. Torn, curled or very thin originals are better placed on the scanner glass.
7. HP LaserJet M631 M632 M633 Paper Jam With No Paper Visible
An HP LaserJet M631 M632 M633 paper jam with no paper visible is usually a sensor question rather than a paper question. A sensor reported paper, or no paper, at the wrong moment; HP’s troubleshooting manual for this family describes the DC controller stopping the job when a sensor detects paper at an inappropriate time.
Symptom and likely root cause
In this kind of HP LaserJet M631 M632 M633 paper jam, codes such as 13.B2.FF, 13.B4.FF, 13.B9.FF and 13.D3.FF can appear at power-on or right after the right door closes, with no job running. Professional repair references attribute these residual jams to a hidden scrap, a sensor flag that sticks, a dirty or failed sensor, or less often a DC controller fault.
Diagnosis you can perform safely
- Recheck the last access point shown on the panel for fragments with a flashlight. Torn corners hide along the right-door guides and at the fuser entrance.
- Confirm that every tray is fully seated and every door is latched.
- Record the full code again. A changed suffix is useful information.
- Change one variable at a time: paper source first, then simplex or duplex mode, then output destination.
Remedy, repair component and when we recommend service
A code that follows one tray points to that tray’s pickup, feed and separation rollers, and a code limited to duplex jobs points to the duplex path. A code fixed at one right-door location points to the registration, transfer, fuser or right-door assembly and its sensor flags. A residual HP LaserJet M631 M632 M633 paper jam that survives these checks belongs with a technician.
Readers seeing jams across several printers or paper sources can compare patterns in our article on why your printer keeps jamming. For an HP LaserJet M631 M632 M633 paper jam, though, the code location is the stronger clue, and flags break easily if forced, so leave sensor work to us.
8. Repair Components Behind Recurring Jams, and When Replacement Makes Sense
When an HP LaserJet M631 keeps jamming at the same code after clean retests, the cause is usually wear or a sensor fault at that location. The table follows our troubleshooting progression: symptom, likely root cause, diagnosis, then the remedy and component involved once testing confirms it.
| Location and codes | Symptom | Likely root cause | Diagnosis | Remedy and repair component |
|---|---|---|---|---|
| Trays and HCI (13.A1–13.A5, 13.AY, 13.B2.D1, 13.B2.D2) | Repeats from one tray | Worn pickup, feed or separation rollers; loading | Same job from another tray | Clean, then replace that tray’s rollers if worn |
| Right-door path (13.B2) | Stops before the fuser | Obstruction, sticking flag or registration sensor | Check guides and flag movement | Registration assembly if flags or sensor fail |
| Fuser area (13.B4, 13.B9) | Stops at or wraps in the fuser | Fuser exit flag or sensor, transfer-area flag, worn fuser | Inspect the cooled fuser and transfer area | Fuser or transfer assembly when confirmed |
| Duplex (13.D3) | Two-sided jobs fail only | Return-path rollers, guides, duplex feed sensor | Simplex versus duplex test | Duplex path repair; right-door assembly when confirmed |
| Output bin (13.E1) | Stalls at the exit | Delivery rollers, exit guides, fuser output sensor | Retest to an empty standard bin | Delivery-path parts that testing confirms |
| Finishing (13.70/13.60, 13.8X/13.83) | Fails only to mailbox or stapler | Accessory path or alignment | Compare with standard output | Accessory component that testing confirms |
We replace fuser assemblies when a fuser is the confirmed fault; we do not rebuild fusers onsite. Every replacement on this list is tied to a confirmed failure, not to the HP LaserJet M631 M632 M633 paper jam code alone.
Maintenance wear is real, but it should be matched to where the paper stops. Our overview of HP LaserJet printer maintenance kits explains what a kit replaces, and installing one will not fix a stuck sensor flag or a damaged right-door guide. Readers looking for HP LaserJet M631 M632 M633 Perform Maintenance and Maintenance Kit Replacement guidance should start from the printer’s maintenance alert and page count rather than a jam code.
Repair versus replacement after a recurring HP LaserJet M631 M632 M633 paper jam comes down to the confirmed part and the printer’s condition. A worn roller set or a fuser on an otherwise healthy M632 is routine. Several unrelated faults, right-door or chassis damage, or a DC controller failure on an older unit are when we discuss replacement; broader faults are covered on our HP LaserJet M631, M632 and M633 printer repair page.
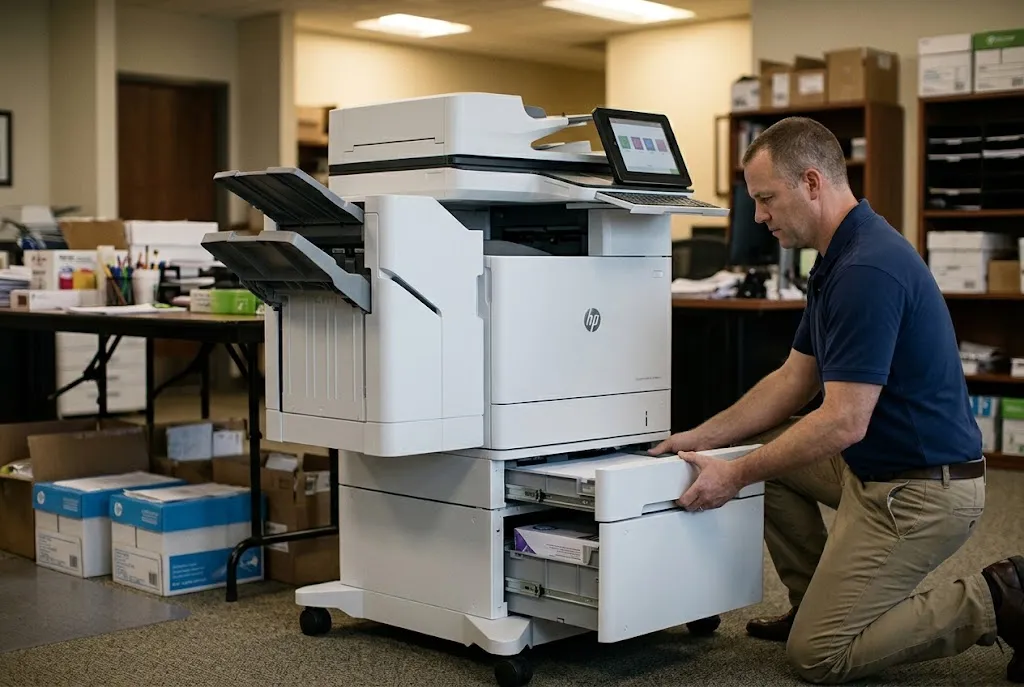
HP Parts, 180-Day Warranty, Your Office
We bring more than 20 years of HP LaserJet experience to offices across Orange County and approved areas of Los Angeles County. Repairs use HP Parts or High Quality Parts and carry a 6-month / 180-day warranty. Same-day service may be available; call (888) 657-0021.
9. Onsite HP LaserJet M631 M632 M633 Paper Jam Repair: What to Have Ready
Onsite HP LaserJet M631 M632 M633 paper jam repair is the right step when paper resists, when reaching it would mean going beyond the right door and fuser, or when the same code returns after a controlled retest. Forcing a sheet out of the fuser, or tearing it in the registration area, can turn a simple jam into a parts repair.
Before you request onsite printer repair for an HP LaserJet M631 M632 M633 paper jam, gather the record from Section 1: the full code and suffix, the tray, paper size and type, simplex or duplex, the output destination and where the leading edge stopped. Add whether the code appears at power-on with no job running. That record lets our technician arrive with a focused plan and, when diagnosis supports it, the right HP Parts.
We bring more than 20 years in the office equipment industry to onsite service throughout Orange County and approved portions of Los Angeles County. Offices in Irvine, Santa Ana, Anaheim and Huntington Beach can start with HP LaserJet printer repair in Orange County, and Los Angeles County offices can check HP LaserJet printer repair in Los Angeles for coverage. Teams managing several models can review our broader HP LaserJet printer repair services.
Service and installed parts carry a 6-month / 180-day warranty. Same-day service may be available, depending on the schedule. Call (888) 657-0021 or email info@printer-repair-experts.net with your HP LaserJet M631 M632 M633 paper jam record, and we will tell you whether it points to a quick correction or a component repair.
Clear the jam once, carefully, and by the documented steps. If an HP LaserJet M631 M632 M633 paper jam comes back at the same place, that repeat is where diagnosis begins, and it is where we take over.
FAQ's - Frequently Asked Questions - HP Laserjet M631 M632 M633 Paper Jam
Yes, once the path is clear, every door is latched and a short retest runs cleanly. If the same HP LaserJet M631 M632 M633 paper jam code returns, stop printing from that source and record the full message, because repeated jams at one point can tear paper into the fuser or registration area.
Usually a small scrap or a door or tray that is not fully latched. Follow the animation again, check the fuser entrance with a flashlight and reseat each tray. If the HP LaserJet M631 M632 M633 paper jam message persists with nothing visible, a sensor flag may be stuck, which needs a technician.
Yes. HP recommends paper that meets its specifications, flexing the stack before loading, keeping it under the stack-height marks and checking room humidity. Damp, curled or heavily recycled stock is worth ruling out before any parts are considered.
Only when the HP LaserJet M631 M632 M633 paper jam traces to worn parts that the kit replaces. A kit will not correct a stuck sensor flag, a damaged guide or a finishing accessory fault, so we match the repair to the location where the paper actually stops.
It marks a variable suffix that changes with the jam condition. Write down the actual characters; they help separate a pickup delay from a residual HP LaserJet M631 M632 M633 paper jam at the same location.
Yes. Our service and the parts we install carry a 6-month / 180-day warranty. That warranty applies when we repair the cause of an HP LaserJet M631 M632 M633 paper jam, using HP Parts, High Quality Parts or Premium Parts.
No. We do not install or guarantee customer-supplied parts. We supply the parts for every HP LaserJet M631 M632 M633 paper jam repair so the diagnosis, the part and the warranty stay connected.
A Stapling Mailbox adds stacked output bins with a rear jam-access door, and the envelope feeder sits in the Tray 3 or Tray 4 position. The printer’s configuration page also lists installed accessories, which matters because an HP LaserJet M631 M632 M633 paper jam in those positions shares code prefixes with standard trays.