
HP LaserJet 4000 4050 4100 Paper Jam:
Clearing It and Stopping the Repeats
An HP LaserJet 4000 4050 4100 paper jam message means a sheet did not reach, or did not clear, a paper-path sensor in the time the printer expected. The fix is rarely a hard tug on the paper. It is knowing which access point to open, how to remove the sheet without tearing it, and what to check when the same jam returns.
We wrote this guide for office managers, administrative staff, and IT personnel who still depend on an HP LaserJet 4000, 4050, or 4100. It starts with what you can safely do at the printer, then explains when a recurring HP LaserJet 4000 4050 4100 paper jam calls for diagnosis instead of another round of clearing. Problems outside the paper path are covered on our page about HP LaserJet 4000, 4050, and 4100 printer repair.
Preview Snapshot
- The 13.x PAPER JAM message names a location, but HP’s guides warn the sheet can be elsewhere; when in doubt, look under the toner cartridge first.
- On all three families, opening and closing the top cover is what clears the jam message once the paper is out.
- Before working in the fuser area of a 4100, HP calls for turning the printer off and letting the fuser cool for 30 minutes.
- A jam that follows one tray points to that tray’s loading or its pickup and separation parts; a jam at one fixed spot points to that section of the path.
- Jams that return after careful loading usually need a technician to inspect rollers, guides, and sensor flags rather than another restart.
What an HP LaserJet 4000 4050 4100 Paper Jam Message Is Telling You
All three families report jams in the 13 series. The HP LaserJet 4000 and 4050 service manual lists the message as 13.XX PAPER JAM [LOCATION], and the HP LaserJet 4100 user guide shows it as 13.x PAPER JAM [LOCATION]. The bracketed location is a starting point, not proof of where the sheet is.
The digits after 13 are stored in the printer’s event log, which a technician prints to review jam history. For the 4000 and 4050, the service manual assigns these meanings:
| Code | Event log description | Area a technician inspects |
|---|---|---|
| 13.1 | Paper delay jam at paper feed area | Tray loading, input-area obstructions, registration assembly, transfer roller seating, feed sensors |
| 13.2 | Paper stopped jam at paper feed area | Same checks as 13.1 |
| 13.5 | Paper delay jam at fuser | Transfer roller, small media belt, paper feed guide, fuser entrance, related sensors |
| 13.6 | Paper stopped jam at fuser | Same checks as 13.5 |
| 13.10 | Paper delay jam at paper reversing area; paper jam at duplexer | Duplexer, rear of the printer, duplexer sensors |
| 13.20 | Paper stopped jam in the paper path | Registration, transfer, paper feed, and fuser areas; seated assemblies; closed doors |
| 13.21 | Top open jam | Same checks as 13.20 |
The same manual notes that the LaserJet 4000 can log 13.22, 13.32, and 13.33 for the duplexer, paper-path, and top-open conditions. Treat this table as a 4000 and 4050 reference only. For a 4100, read sub-codes against 4100 service documentation, and do not borrow jam-code tables written for newer LaserJet models.
The practical takeaway is simpler. An HP LaserJet 4000 series 13 paper jam error says a sheet stalled. The sub-code, plus the spot where the paper actually sits, tells you whether to look at the tray, the toner area, the fuser, or the duplexer. This guide does not cover the HP LaserJet 4100 MFP, whose scanner and document feeder add different access points.
Find Where the Leading Edge Stopped Before You Pull Anything
Every HP LaserJet 4000 4050 4100 paper jam leaves evidence. HP’s diagnostic table for the 4000 and 4050 asks a technician to note where the leading edge of the first sheet stopped and whether any sheets are torn. Ask that question before you clear the jam, because the position of the sheet often explains the cause, and that observation is the core of sound HP LaserJet 4000 paper jam troubleshooting.
- Where does the leading edge stop? Paper still at the tray points to pickup or feed. Paper under the toner cartridge points to registration or transfer. Paper partly out the back points to the fuser or exit.
- Does one tray work? Print the same job from Tray 1 and from Tray 2, using the same paper, and compare.
- Does the printer pull multiple sheets? Two or three sheets jammed together suggest a separation problem or paper that was not separated before loading.
- Does the fault recur at the same point? A fixed stopping point narrows the search to one section of the path.
- Is the duplexer installed? If jams happen only on two-sided jobs, the duplex path becomes the main suspect.
Write the answers down with the message on the display. That short record speeds up an HP LaserJet 4000 4050 4100 paper jam diagnosis whether you keep troubleshooting yourself or hand it to a technician.
Clearing Paper Safely From Each Access Point
Clearing an HP LaserJet 4000 4050 4100 paper jam follows a few shared rules from HP’s guides: pull slowly, and never force a sheet that will not move. A small torn scrap left inside can cause the next jam. When the paper is out, open and close the top cover to clear the message. Model-specific manuals are listed on the HP support page for the LaserJet 4050 printer series.
Top cover and toner cartridge area
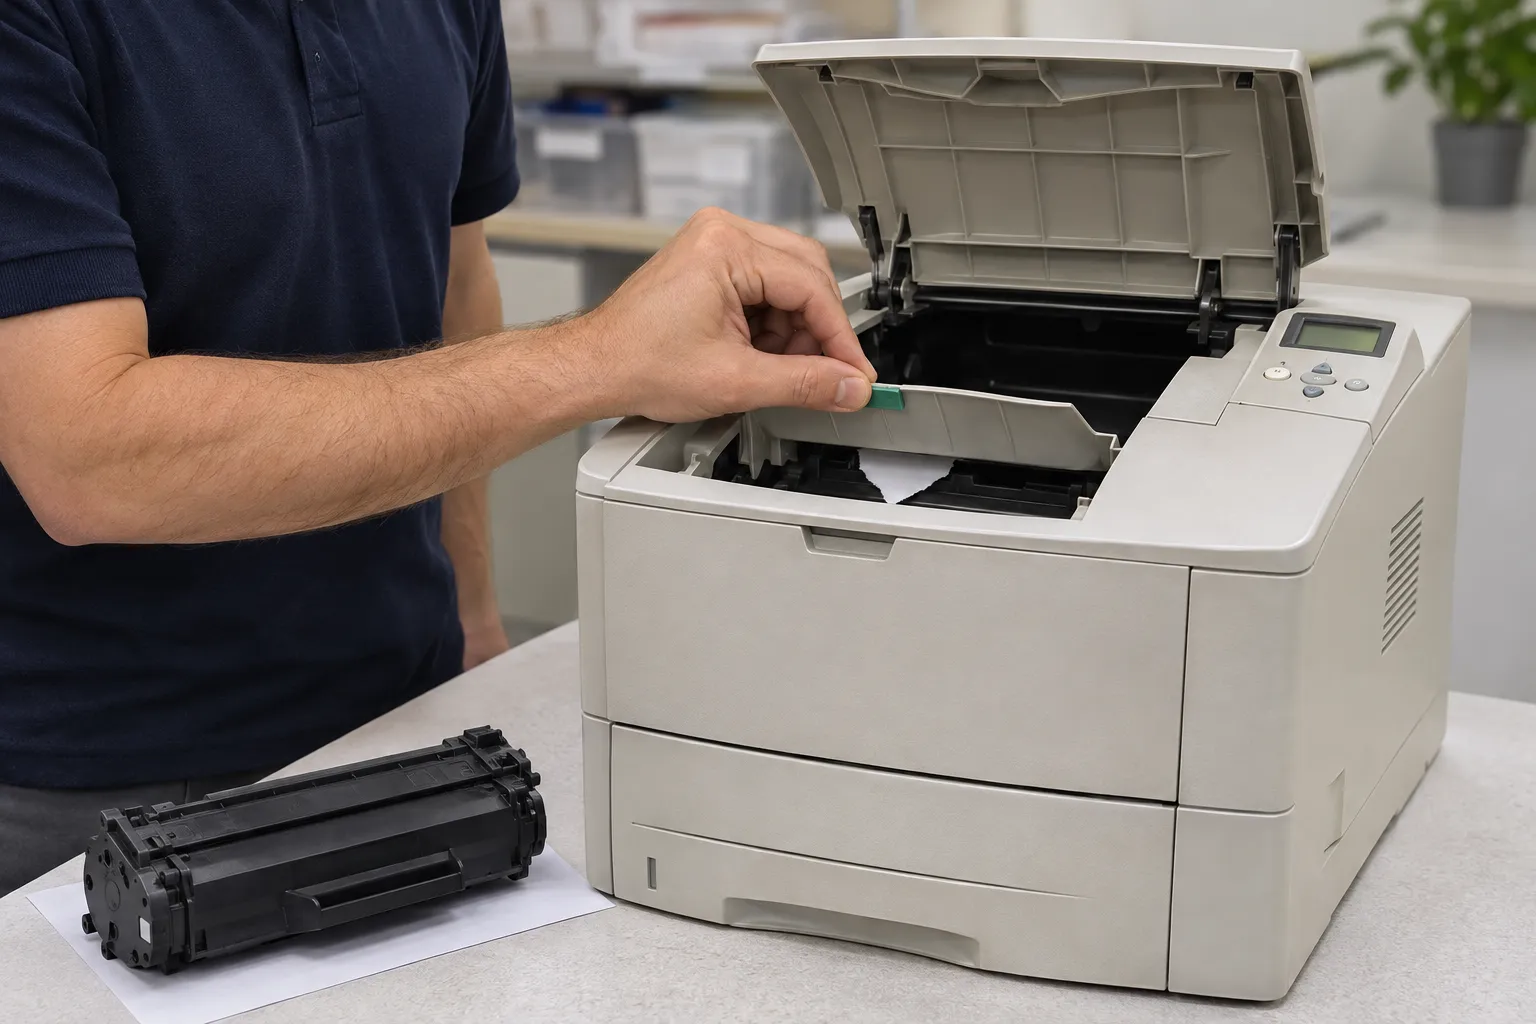
When the jam location is not obvious, HP recommends looking here first. On the 4100, open the top cover, remove the toner cartridge, lift the paper access plate with its green handle, and slowly pull the paper out. HP cautions against exposing the cartridge to light for more than a few minutes, so cover it and reinstall it promptly.
Loose toner may come out with the sheet. Wipe it from the printer with a dry, lint-free cloth; HP notes that remaining loose toner should clear after a few pages. Toner on clothing should be wiped off dry and washed in cold water, because hot water sets it into fabric.
Tray 1, Tray 2, and optional trays
For Tray 1, the fold-down multipurpose tray, the 4000 and 4050 guides say to slowly pull the paper out of the printer. For Tray 2 and optional lower trays, slide the tray out and remove damaged sheets. If an edge shows in the feed area, pull it down and out; pulling straight out tends to tear it.
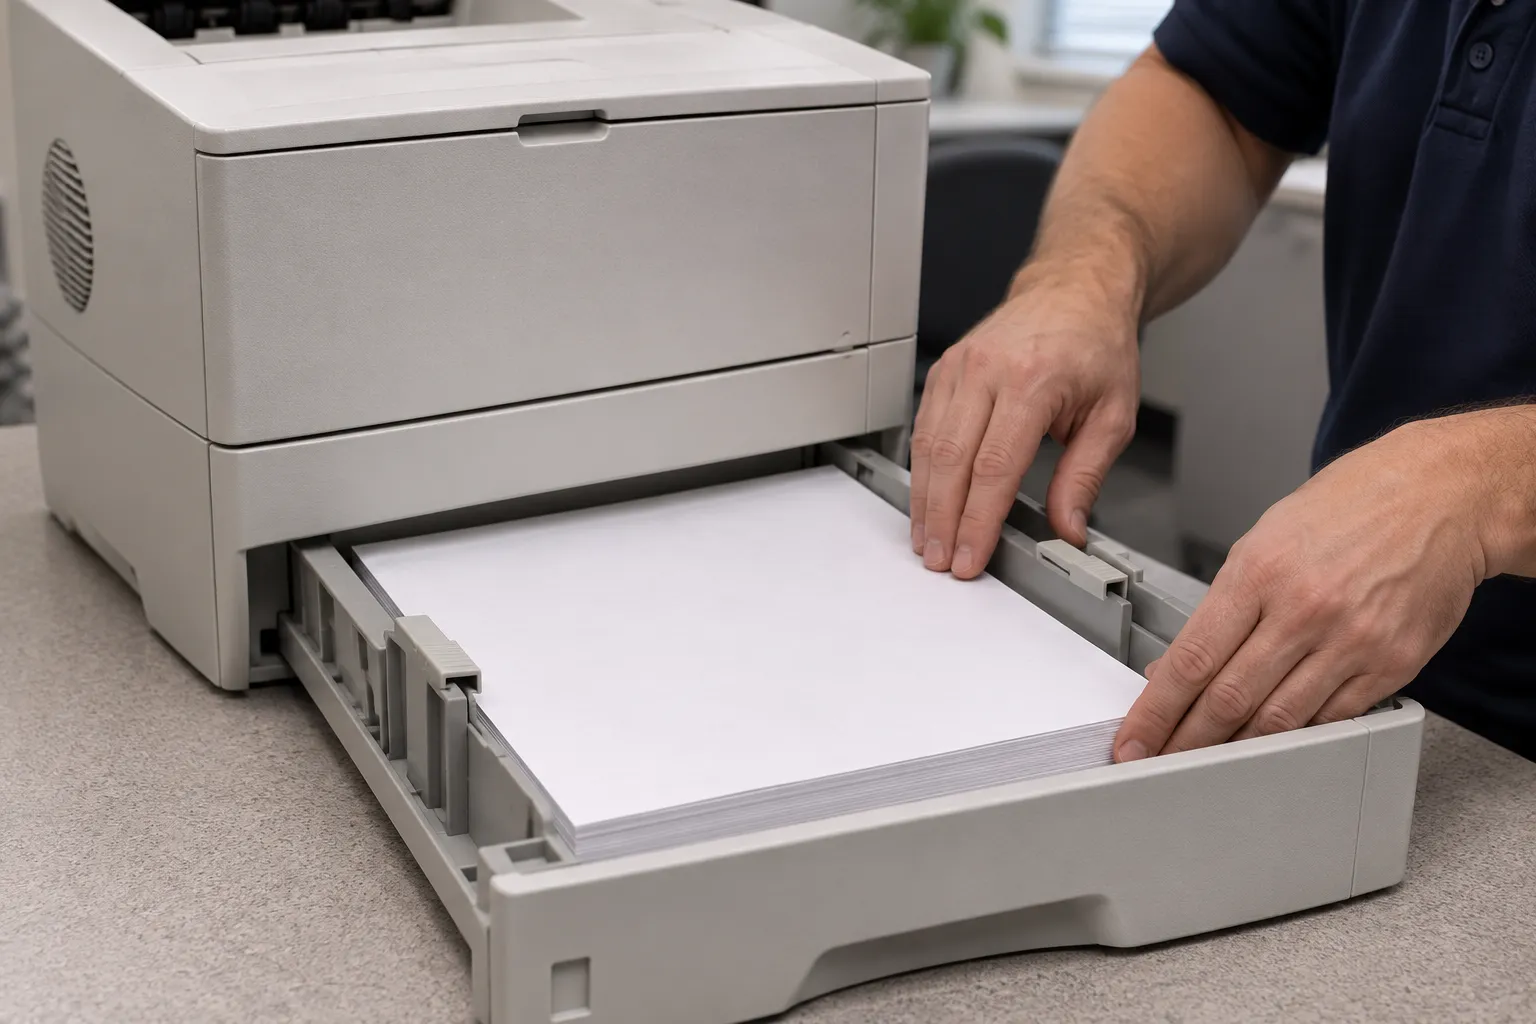
A sheet caught in a lower tray can sometimes be removed through the tray above it or from the top cover area. Before sliding a tray back in, make sure the stack lies flat at all four corners and sits below the tabs on the guides.
Rear output and fuser area
If most of the sheet is still inside, the 4100 user guide recommends removing it through the top cover area. If the trailing edge is at the back, open the rear output bin, grip both sides of the paper, and pull slowly. Opening the top cover fully can release pressure on a stubborn sheet.
If the sheet tears or will not come free, HP’s 4100 fuser-area procedure starts with turning the printer off, waiting 30 minutes for the fuser to cool, and unplugging the power cord. Follow the rest of that procedure exactly, and stop if the paper will not release. Do not use tools, and do not remove the fuser.
Installed duplexer
On a 4000 with a duplexer, open the duplexer’s rear door and slowly pull out any paper. If the message persists, lift the duplexer slightly and pull it out, remove any paper on top of Tray 2 from the rear, then turn the duplexer over and check it. Reinstall it and open and close the top cover.

Stubborn 13.x Jam? Start With the Onsite Promotion
Our $69.99 Onsite Printer Repair Promotion applies to one HP LaserJet 4000, 4050, or 4100 per onsite visit; parts are not included. Call (888) 657-0021 or email info@printer-repair-experts.net to schedule. Limitations may apply.
Why the Jam Message Stays On After the Paper Is Gone
An HP LaserJet paper jam message will not clear for a short list of reasons. HP’s 4000 guide says a persistent message means paper is still inside, and the 4100 guide adds that the sheet may sit somewhere other than the named location. The service manual gives one more: if every sheet is out, a paper-path sensor or its flag may be stuck or broken.
It is also the classic HP LaserJet paper jam with no paper visible, and the most common reason an HP LaserJet 4000 4050 4100 paper jam seems to come from nowhere. A torn corner, a label backing, or a scrap behind the paper access plate can hold a sensor flag in place while nothing shows from the front. Checking every access point, including underneath an installed duplexer, finds most of them.
| Symptom | The message returns immediately, or no paper can be seen anywhere. |
|---|---|
| Root cause | A hidden scrap, a cover or tray that is not fully closed, or a sensor flag that is stuck or damaged. |
| Diagnosis | Recheck every access point and confirm covers and trays are seated. A technician then tests the paper-path sensors and their flags. |
| Remedy | Remove the remaining fragment and reseat assemblies. Replace a sensor or flag only when testing confirms it has failed. |
| Repair component | Paper-path sensor or sensor flag in the affected area. |
| When we recommend service | When the message persists after every access point is clear and every cover is closed. |
When the jam starts after a toner change
An HP LaserJet paper jam after replacing toner usually belongs in this group. On the 4000 and 4050, 13.21 is a top-open jam, so confirm the cartridge is fully seated, the paper access plate is down, and the top cover is latched. If the sheet stops near the toner area, the manual’s feed-area checks also include transfer roller seating.
Restarting the printer is worth one try, since it rechecks the sensors. A restart cannot move a scrap or straighten a bent flag, though. A message that survives a restart and a careful search is a physical problem that needs hands-on inspection.
One Tray Jams and the Others Do Not: Isolating a Feed Problem
Comparing paper sources is one of the quickest ways to narrow down HP LaserJet 4050 recurring paper jams, and the same logic holds for the 4000 and 4100. HP’s service table treats a jam from one specific tray as its own diagnostic branch, which a technician confirms with the printer’s paper path test.
HP LaserJet 4000 4050 4100 Tray 2 feeding problems
Start with the stack. Use paper within HP’s specifications, keep it below the maximum fill marks, set the guides to the paper size, and push the tray fully in. HP advises against fanning; bend the stack to separate sheets instead. Turning the stack over or rotating it 180 degrees can also help.
If Tray 2 still fails while Tray 1 feeds the same paper cleanly, the tray’s own pickup path is the most likely difference. That is the point to stop adjusting and have the pickup, feed, and separation parts inspected. A repeat HP LaserJet 4000 4050 4100 paper jam from one drawer is rarely solved by another reload.
HP LaserJet multipurpose tray paper jams
Tray 1 handles envelopes and heavier media, which also makes it the tray most affected by mixed media and overfilled stacks. HP’s 4100 guide suggests a smaller Tray 1 stack when jams repeat. The paper type and size set for the tray should match what is actually loaded.
| Symptom | No-pick, two sheets pulled together, or a skewed sheet that stalls near the feed area. |
|---|---|
| Root cause | Loading or media problems, or worn pickup, feed, or separation rollers for that tray. |
| Diagnosis | Compare trays with the same paper. A technician runs the paper path test from each source and inspects the rollers. |
| Remedy | Correct loading and media first. Replace rollers only after inspection confirms wear. |
| Repair component | Pickup roller, feed roller, separation roller, or the tray’s feed assembly. |
| When we recommend service | When one tray keeps jamming with fresh, correctly loaded paper. |
Symptoms alone do not prove a roller has failed. Damp paper, a bent guide, or a sheet left in the feed area can cause the same misfeeds. That is why HP LaserJet pickup and separation roller replacement should follow inspection rather than come first.
Jams Near the Fuser and Rear Output: Obstruction or Failed Part?
Not every HP LaserJet 4000 4050 4100 paper jam at the back of the printer means the fuser has failed.
HP LaserJet rear output paper jams look serious because the sheet is often wrinkled or partly fused, yet many are simple obstructions. For 13.5 and 13.6 on the 4000 and 4050, the service manual’s checks begin with the transfer roller, the small media belt, and the path past the paper feed guide. The fuser is one stop on that list, not the first.
Try the other output bin. HP’s repeated-jam guidance for the 4100 lists switching output bins as a test. A jam that disappears when the output changes tells a technician where to look.
A paper jam near the fuser is not the same as a fuser error. If the display reports a fuser fault rather than a 13.x jam, that is a separate problem, covered on our page about HP LaserJet 4000, 4050, and 4100 fuser errors.
| Symptom | Sheets stop at the back, come out accordion-folded, or tear at the exit. |
|---|---|
| Root cause | A scrap or label at the fuser entrance, a transfer or feed problem upstream, or wear in the fuser area. |
| Diagnosis | Inspect the path from the toner area to the exit, compare output bins, and check the sensors in that area. |
| Remedy | Remove obstructions and correct upstream feed problems. Replace the fuser assembly only when diagnosis shows it is the cause. |
| Repair component | Fuser assembly, transfer roller, or paper-path sensors in the fuser area. |
| When we recommend service | When a cooled, cleared fuser area keeps catching paper. |
When a fuser assembly has failed, we replace the assembly. We do not rebuild fusers on site.
Tracing the Jam Back to the Part
When the leading edge stops at the same point every time, our technician checks the pickup, separation, registration, and fuser-area path on site before recommending any part. Call (888) 657-0021 to schedule paper-path diagnosis for an HP LaserJet 4000 4050 4100 paper jam that keeps returning.
Duplex-Only Jams on Printers With an Installed Duplexer
This section applies only when a duplexer is attached. The 4100DTN includes one, other 4100 models accept it as an option, and HP’s 4000 guide treats it as an optional accessory. A printer that jams only on two-sided jobs has a different suspect list from one that jams on every page.
HP LaserJet duplexer paper jams on the 4000 and 4050 log as 13.10, a delay at the paper reversing area or duplexer. The service manual directs technicians to inspect the duplexer and the rear of the printer, test the duplexer’s sensors, and replace the duplexer when one of those sensors has failed.
| Symptom | Single-sided jobs print normally; two-sided jobs stop partway. |
|---|---|
| Root cause | Paper behind the duplexer or on top of Tray 2, damage to the duplexer, or a failed duplexer sensor. |
| Diagnosis | Clear the duplexer and the area beneath it, print single-sided and two-sided tests, then test the duplexer’s sensors. |
| Remedy | Remove obstructions and reseat the unit. Replace the duplexer if a sensor in it is faulty. |
| Repair component | Duplexer; on the 4000 and 4050, the duplex D-roller is also a scheduled maintenance item. |
| When we recommend service | When two-sided jams continue after the duplexer has been removed, cleared, and reseated. |
HP’s 4100 guide also says not to print on both sides of envelopes, transparencies, or label sheets. If an HP LaserJet 4000 4050 4100 paper jam happens only on those materials in duplex mode, the job settings are the first thing to change.
Repeat Jams, Worn Rollers, and the 200,000-Page Maintenance Point
The HP LaserJet 4000 and 4050 service manual calls for printer maintenance at 200,000 pages. Its list covers the fusing assembly, the transfer roller, the pickup and separation rollers, and the duplex D-roller when a duplexer is installed. The 4100 user guide lists its maintenance kit as C8057A for 110-volt printers and C8058A for 220-volt printers.
Kits are model-specific, so confirm compatibility for the exact printer rather than assuming one kit fits all three families. An inspection may show several worn parts at once. Our page on HP LaserJet printer maintenance kits explains how a kit replacement is planned.
| Symptom | Jams spread across several trays, misfeeds increase, and the page count is near the maintenance point. |
|---|---|
| Root cause | Normal wear in the rollers and fuser area. |
| Diagnosis | Review the event log for jam history, check the page count, and inspect the wear items. |
| Remedy | Replace worn parts with the correct model-specific kit or individual components. |
| Repair component | Pickup and separation rollers, transfer roller, fuser assembly, and the duplex D-roller where applicable. |
| When we recommend service | When jams increase across several sources on a high-count printer. |
Habits matter as much as parts in preventing the next HP LaserJet 4000 4050 4100 paper jam. HP’s guides warn against curled, damaged, or previously printed paper, against opening trays or doors during a job, and against overfilled trays. Building those points into regular HP printer maintenance keeps a busy 4000, 4050, or 4100 from turning gradual wear into a daily interruption.
A practical example: when an accounting team runs month-end statements through one 4050 and the HP LaserJet 4000 4050 4100 paper jam shows up only on that run, check the paper first. A new ream from a different supplier, stored near a window, can behave very differently from the stock the printer handled the month before.
Keep Your 4000, 4050, or 4100 Feeding Clean
More than 20 years in the office equipment industry, HP Parts, High Quality Parts, or Premium Parts, and a 6-month / 180-day warranty on service and installed parts. We serve Orange County and approved portions of Los Angeles County, and same-day service may be available. Email info@printer-repair-experts.net or call (888) 657-0021.
When an Onsite Technician Makes Sense and What to Expect
Call for help when an HP LaserJet 4000 4050 4100 paper jam comes back after you have cleared every access point, loaded fresh paper correctly, and compared trays. At that stage, more clearing usually means more torn sheets. Our HP LaserJet 4100 paper jam repair work, and the same work on 4000 and 4050 printers, starts by reproducing the jam and tracing it to one section of the path.
Onsite HP LaserJet paper jam diagnosis follows the checks HP’s service manual describes. We review the event log, run the paper path test from each source, inspect rollers, guides, and sensor flags, and confirm that covers and assemblies are seated. When a failed part is identified, we replace it with HP Parts, High Quality Parts, or Premium Parts and explain the choice before work begins.
After a repair, we confirm it with repeated test prints through the affected tray and, on duplex-equipped printers, through the two-sided path. A single good page does not prove that a recurring HP LaserJet 4000 4050 4100 paper jam is gone.
Our onsite printer repair service is part of our broader professional HP LaserJet printer repair work, and repairs carry a 6-month / 180-day warranty on service and installed parts. Readers still weighing options can review where to get your printer fixed and our printer repair cost and promotion details.
We serve Orange County and approved portions of Los Angeles County, and same-day service may be available when scheduling allows. See HP LaserJet printer repair in Los Angeles and HP LaserJet printer repair in Orange County for coverage details. When you call (888) 657-0021, have the jam message and the spot where the sheet stopped ready.
FAQ's - Frequently Asked Questions - HP LaserJet 4000, 4050, and 4100 Paper Jams
Yes, after a one-time HP LaserJet 4000 4050 4100 paper jam with no torn paper left behind. Print a few plain pages first, since HP notes that loose toner from a jam should clear within a few sheets. If the same jam returns at the same point, stop clearing and look for the cause.
Only the message, and only when no paper remains. A restart cannot remove a scrap or free a stuck sensor flag. On these printers, the documented way to clear the message is to remove the paper, then open and close the top cover.
The sheet may be under the toner cartridge, behind the paper access plate, at the rear output, or under an installed duplexer. If every area is clear and the message stays, a paper-path sensor or flag may need inspection.
Because the two trays use different pickup paths. After checking loading, guides, and fill level, a Tray 2-only problem usually points to that tray’s pickup, feed, or separation parts, which a technician confirms by inspection.
Confirm the cartridge is fully seated, the paper access plate is lowered, and the top cover is latched. On the 4000 and 4050, a top-open condition logs as its own jam code, so an unlatched cover can look like a paper problem.
Do not assume so. HP lists specific kits for the 4100 by voltage, and the 4000 and 4050 have their own maintenance parts list. We confirm compatibility for the exact model before ordering or installing parts.
Yes. Our 6-month / 180-day warranty covers our service and the parts we install. We do not install or warrant customer-supplied parts.
Often it is, when the problem is wear in the paper path rather than a major failure. The decision depends on the diagnosis and on part availability at the time of service, so we confirm both before any repair begins.